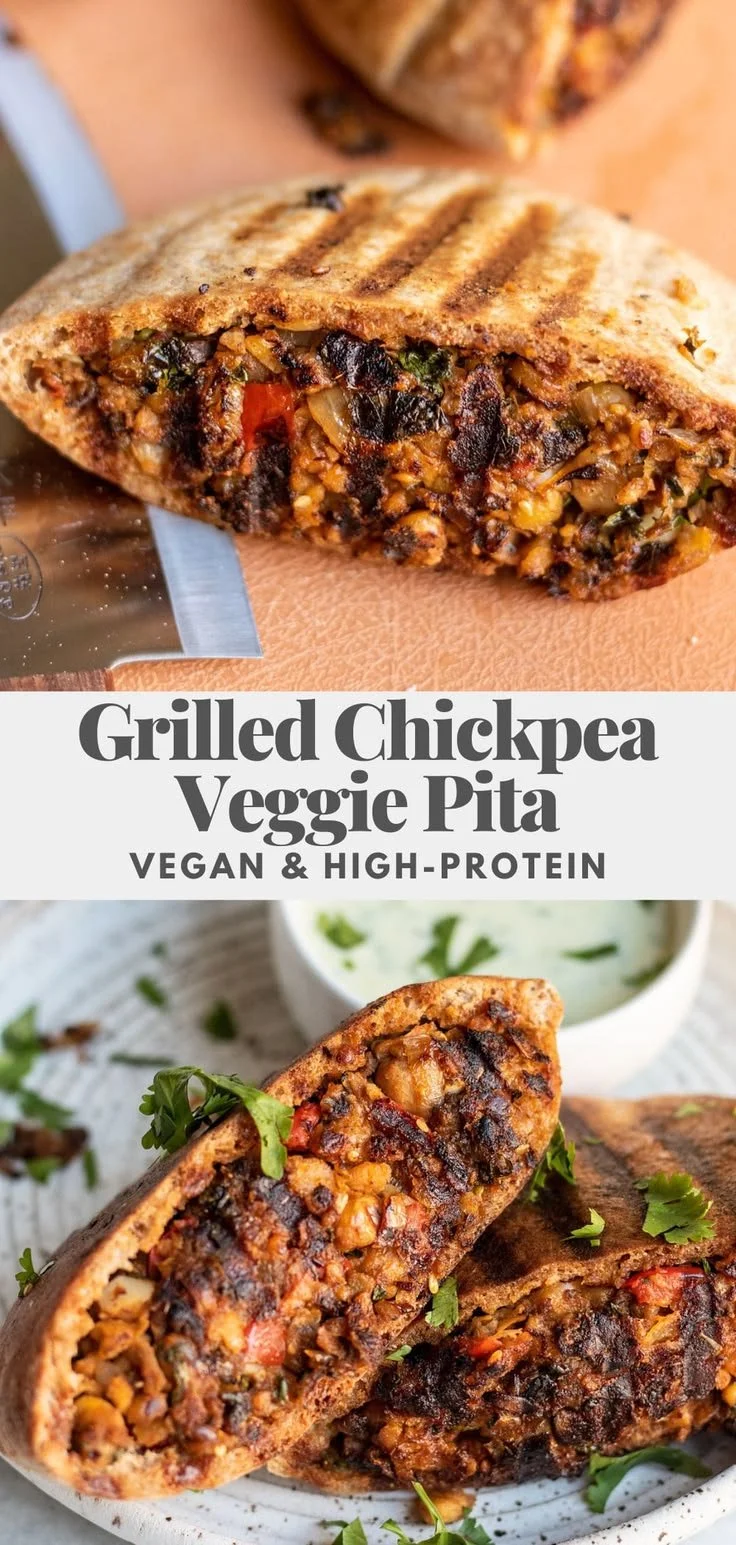
Grilled Chickpea Veggie Pitas are a delightful, healthy meal perfect for busy weeknights or casual get-togethers. This recipe combines the nuttiness of chickpeas with the vibrant flavors of fresh vegetables, all tucked into warm, toasty pita pockets. They’re not just easy to make; they’re also a great way to enjoy a delicious plant-based meal that satisfies everyone.
Why You’ll Love Grilled Chickpea Veggie Pitas
- Quick and Easy Preparation: With only a few steps, you can have a tasty meal ready in about 30 minutes.
- Versatile Ingredients: Use fresh vegetables, leftover cooked grains, or your favorite spices to customize the filling.
- Healthy and Satisfying: Packed with plant-based protein from chickpeas and fresh veggies, these pitas are both nourishing and filling.
- Family-Friendly: Even picky eaters can enjoy these flavorful pitas; they are fun to assemble and eat.
- Great for Meal Prep: Assemble the ingredients in advance for easy lunches or dinners throughout the week.
Recipe Overview
- Prep Time: 10 minutes
- Cook Time: 10 minutes
- Total Time: 20 minutes
- Servings: 4
- Difficulty Level: Easy
Ingredients You’ll Need for Grilled Chickpea Veggie Pitas
-
Protein Base:
- 1 can chickpeas, drained and rinsed
- 2 tablespoons za’atar spice
-
Pita and Vegetables:
- 4 whole grain pitas
- 1 tablespoon olive oil
- 1 cucumber, diced
- 1 tomato, diced
- 1/4 red onion, thinly sliced
-
Seasoning:
- Salt and pepper to taste
Za’atar spice brings a unique, herby flavor to the dish, but if it’s unavailable, you can substitute with a mix of oregano, thyme, and sesame seeds.
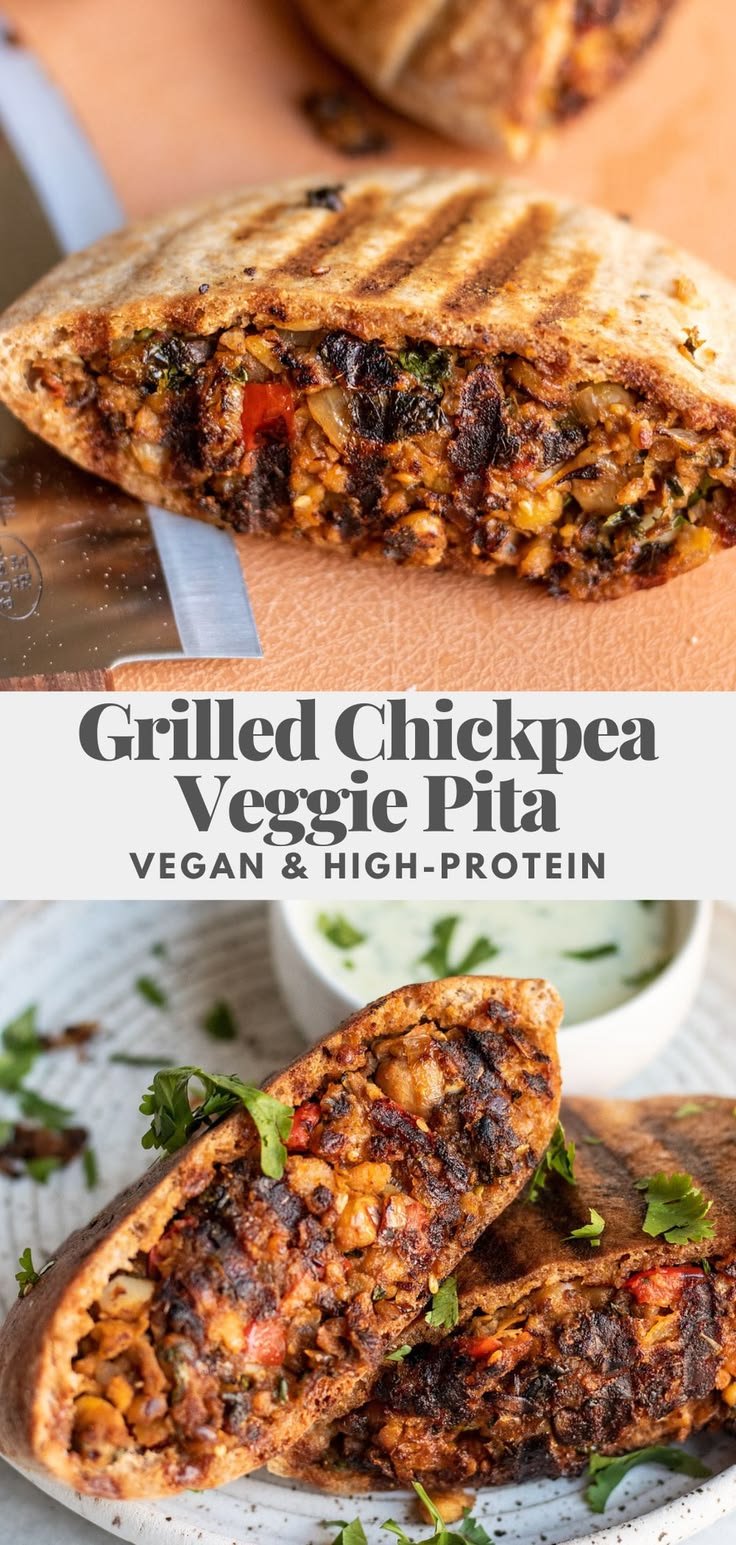
How to Make Grilled Chickpea Veggie Pitas
-
Prepare Chickpeas: In a bowl, combine the chickpeas and za’atar spice. Mash slightly with a fork to release some of the chickpeas’ natural creaminess while keeping some whole for texture.
-
Warm the Pitas: Heat the whole grain pitas on a grill or in a skillet over medium heat until warm and pliable, about 1-2 minutes per side.
-
Stuff the Pitas: Spread the chickpea mixture evenly inside the warm pitas. Add diced cucumber, tomato, and sliced red onion generously to each pita.
-
Drizzle Olive Oil: Lightly drizzle the stuffed pitas with olive oil and season with salt and pepper to taste.
-
Grill the Stuffed Pitas: Place the stuffed pitas on the grill or skillet for 2-3 minutes, or until the bread is crispy and golden.
-
Serve Warm: Remove from heat and serve warm, allowing everyone to dig in!
Tips for Success
- Mash Just Right: Don’t over-mash the chickpeas; leave some whole for texture.
- Quality Pitas: Choose fresh whole grain pitas, as they hold up better when grilled.
- Don’t Skip Seasoning: Proper seasoning is key! Taste the chickpea mixture and adjust salt and pepper to your preference before stuffing.
- Avoid Sogginess: If preparing ahead, keep the stuffed pitas chilled until ready to grill to avoid sogginess.
Easy Variations
- Add Protein: Mix in cooked quinoa, lentils, or diced grilled chicken for extra protein.
- Spice It Up: Add crushed red pepper flakes or cayenne to the chickpea mixture for a spicy kick.
- Veggie Swap: Substitute or add cooked carrots, bell peppers, or spinach for a different flavor and texture.
- Cheese Options: Crumbled feta or goat cheese can add a creamy tang, making it a delightful addition for dairy enthusiasts.
What to Serve with Grilled Chickpea Veggie Pitas
- Greek Salad: A light Greek salad complements the pitas well, adding freshness with its crisp vegetables.
- Roasted Vegetables: Seasonal roasted veggies add a hearty side while enhancing the overall flavor.
- Hummus: A side of hummus provides a creamy dip option, perfect for an extra layer of flavor.
- Chickpea Salad: A refreshing chickpea salad with lemon and herbs is a great way to echo the main ingredients.
- Pita Chips: Crunchy pita chips make for a delightful side snack, great for dipping in any leftover hummus.
Storage and Reheating
- Refrigerator Storage: Store any leftovers in an airtight container in the fridge for up to 3 days.
- Freezer Storage: You can freeze the chickpea mixture separately in a freezer-safe container for up to a month. Reheat before stuffing and grilling.
- Reheating: To reheat, grill pitas briefly to regain crispness or warm in a microwave for about 15-20 seconds (they’ll be soft but should not be soggy).
- Meal Prep Note: Prepare the chickpea mixture and slice the veggies ahead for quick assembly during busy days.
Common Mistakes to Avoid
- Overstuffing: Trying to fit too much filling can make it hard to close and eat the pitas.
- Skipping the Oil: Don’t skip drizzling olive oil; it adds a richness that enhances flavors.
- Cold Pitas: Starting with cold pitas can result in a less-enjoyable texture; always warm them first.
- Overcooking: Be careful not to grill the pitas too long; they can become too hard if overcooked.
Grilled Chickpea Veggie Pitas: Background & Cultural Inspiration
The veggie-filled pita has roots in Middle Eastern cuisine, where flatbreads serve as a canvas for various flavorful fillings. The use of chickpeas reflects the region’s love for legumes, offering both nutrition and hearty textures. Za’atar, a prevalent spice blend in Middle Eastern dishes, adds a unique, earthy flavor that not only uplifts the dish but also highlights the harmony between the chickpeas and vegetables. This recipe is not just a meal; it’s a celebration of vegetarian cooking, emphasizing health, flavor, and simplicity.
Frequently Asked Questions
Can I make this recipe ahead of time?
Yes, you can prepare the chickpea mixture and chop the vegetables in advance. Store them separately in the fridge and assemble the pitas just before grilling to keep them fresh.
Can I use dried chickpeas instead of canned?
Absolutely! Just make sure to soak and cook the dried chickpeas beforehand, as it can be a bit time-consuming.
How do I adjust the spice level?
For a milder flavor, skip the pepper or use less za’atar. You can also add a dollop of yogurt to balance the heat if you decide to spice things up.
What can I replace za’atar with?
If you don’t have za’atar, a mix of oregano, thyme, and sesame seeds works well for a similar flavor profile.
How can I store leftovers?
Store leftover filling in an airtight container in the fridge for up to three days. The pitas are best enjoyed fresh, but the filling can be easily used in salads or wraps later.
Final Thoughts
Grilled Chickpea Veggie Pitas are an excellent choice for a quick, healthy, and delicious meal. Their flexibility allows you to adapt the filling to suit your taste, making them a perfect option for any occasion. Whether you’re serving them at a cozy family dinner or enjoying a simple lunch, these pitas are sure to delight. Give this recipe a try and savor the bright flavors and textures; you won’t be disappointed!
PrintGrilled Chickpea Veggie Pitas

Healthy and delicious pitas filled with chickpeas and fresh vegetables, perfect for a quick weeknight meal.
- Prep Time: 10 minutes
- Cook Time: 10 minutes
- Total Time: 20 minutes
- Yield: 4 servings
- Category: Main Course
- Method: Grilling
- Cuisine: Mediterranean
- Diet: Vegan
Ingredients
- 1 can chickpeas, drained and rinsed
- 2 tablespoons za’atar spice
- 4 whole grain pitas
- 1 tablespoon olive oil
- 1 cucumber, diced
- 1 tomato, diced
- 1/4 red onion, thinly sliced
- Salt and pepper to taste
Instructions
- Combine the chickpeas and za’atar spice in a bowl. Mash slightly with a fork.
- Heat the whole grain pitas on a grill or skillet over medium heat until warm, about 1-2 minutes per side.
- Spread the chickpea mixture evenly inside the warm pitas. Add diced cucumber, tomato, and sliced red onion.
- Drizzle the stuffed pitas with olive oil and season with salt and pepper.
- Place the stuffed pitas on the grill or skillet for 2-3 minutes until they’re crispy and golden.
- Serve warm and enjoy!
Notes
Don’t over-mash the chickpeas; it adds texture. Use fresh whole grain pitas for the best results.