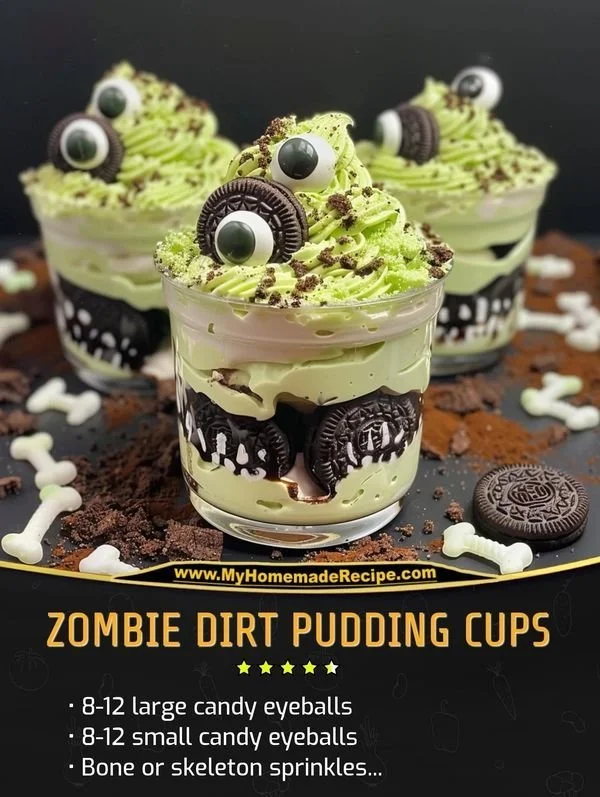
Halloween often brings a lot of fun and creativity, especially when it comes to treats. One such delight that fits right into the spooky spirit is Zombie Dirt Pudding Cups. This no-bake dessert combines the rich flavors of Oreos, creamy instant pudding, and Cool Whip, making it a hit for both kids and adults alike. With its playful presentation and delicious taste, this treat is sure to impress at any Halloween gathering or party.
Why You’ll Love Zombie Dirt Pudding Cups
- Fun and Festive: These pudding cups are a playful nod to Halloween, making them perfect for parties and gatherings.
- No Baking Required: They come together quickly without the need for an oven, making them ideal for busy schedules.
- Layered Texture: The combination of creamy pudding and crunchy Oreo crumbs creates a delightful contrast that kids love.
- Customizable: You can easily adjust the decorations and flavors to suit your preferences, making them versatile for different occasions.
- Great for Kids: Kids will enjoy helping to assemble these cups and getting creative with their toppings.
- Make-Ahead Friendly: Prepare them in advance, so you’re ready for your Halloween festivities without last-minute stress.
Recipe Overview
- Prep Time: 15 minutes
- Cook Time: 0 minutes
- Total Time: 15 minutes (plus chilling time)
- Servings: 4 to 6
- Difficulty Level: Easy
Ingredients You’ll Need for Zombie Dirt Pudding Cups
- 1 package of Oreos: The main ingredient for the crumb layer. You can use regular or double-stuffed Oreos for a richer texture.
- 1 package of instant pudding mix (chocolate or vanilla): This provides the creamy base of the dessert. Chocolate pudding adds a more decadent flavor.
- 2 cups of milk: Needed to prepare the pudding.
- 1 tub of Cool Whip: This adds lightness and creaminess to the pudding mixture.
- 1 teaspoon of mint extract (optional): For a refreshing twist that complements chocolate flavors.
- Chocolate candies or gummy worms for decoration: Use these to enhance the spooky look of your dessert.
How to Make Zombie Dirt Pudding Cups
1. Crush the Oreos
Start by placing the Oreos in a zip-top bag. Use a rolling pin to crush them into fine crumbs. Set aside for later layering.
2. Prepare the Pudding
In a mixing bowl, whisk together the instant pudding mix and milk. Continue whisking for 2-3 minutes until the mixture is thick and smooth.
3. Fold in the Cool Whip
Gently fold the Cool Whip into the pudding mixture until fully combined. If you’re using mint extract, add it now and mix gently.
4. Layer the Ingredients
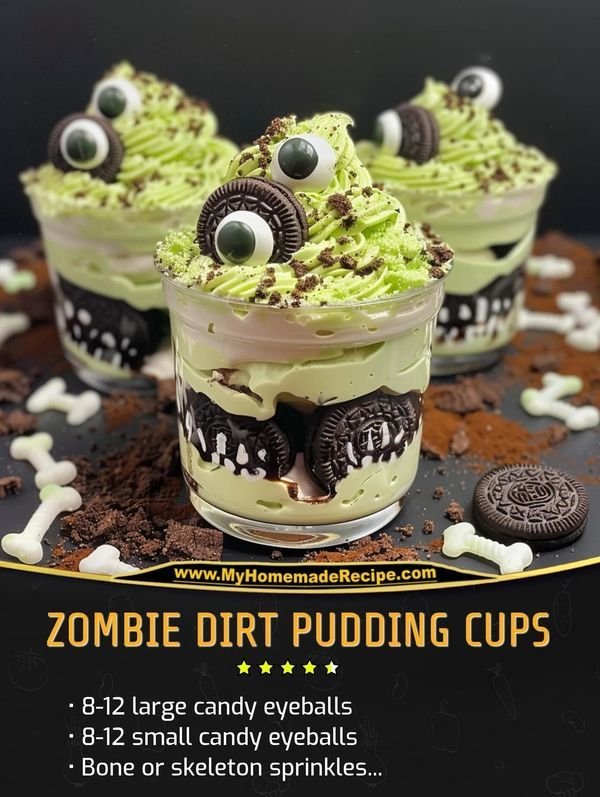
Take serving cups and begin layering. Start with a layer of pudding, followed by a layer of crushed Oreos. Repeat until the cups are filled, finishing with a layer of pudding.
5. Add Final Touches
Top each cup with more crushed Oreos and add decorations, such as chocolate candies or gummy worms, to create a spooky appearance.
6. Chill Before Serving
Cover the cups and refrigerate them until you’re ready to serve. For best results, chill for at least 30 minutes to allow the flavors to meld.
Tips for Success
- Use a food processor: If you want finer Oreo crumbs, a food processor can save you time.
- Check the pudding consistency: Make sure your pudding is thick enough before folding in the Cool Whip to avoid a runny dessert.
- Layer carefully: Use clear cups to showcase the layers. Spoon the ingredients in slowly to maintain distinct layers.
- Chill adequately: Let the cups chill for at least 30 minutes or even overnight for better flavor and texture.
- Experiment with flavors: Feel free to use other flavors of pudding or cookies for a customized taste.
Easy Variations
- Dairy-Free Option: Substitute the milk with almond or coconut milk and use dairy-free whipped topping.
- Flavor Twist: Try using vanilla pudding and crushed vanilla wafers for a different flavor profile.
- Add Fruits: Incorporate some chopped fruits, like strawberries or raspberries, between the layers for added freshness.
- Extra Crunch: Mix in some chopped nuts or toffee bits for extra texture.
- Seasonal Twists: Use pumpkin spice pudding or add spice cake mix for a fall-inspired variation.
What to Serve with Zombie Dirt Pudding Cups
- Apple Slices: Fresh apple slices offer a crunchy contrast and a refreshing accompaniment.
- Caramel Dip: A sweet caramel dip pairs well and adds an extra layer of flavor to the fruity sides.
- Cheese Platter: A selection of cheeses with the sweetness of the pudding creates a delightful balance.
- Halloween-themed Drinks: Serve with themed punch or spooky mocktails for a complete festive experience.
- Popcorn: Candied or chocolate-covered popcorn can provide an additional fun snack option.
Storage and Reheating
- Refrigerator Storage: Store any leftovers in an airtight container in the fridge for up to 3 days.
- Freezer Storage: While it’s best not to freeze the pudding cups, any leftover pudding can be frozen in a sealed container for up to one month; thaw in the refrigerator before serving.
- Best Reheating Method: Since this a no-bake dessert, no reheating is necessary. Enjoy cold for the best texture and flavor.
- Preserving Texture: Keep the cups covered to maintain their creaminess and prevent drying out.
Common Mistakes to Avoid
- Using warm milk: Ensure the milk is cold before mixing it with the pudding for the best consistency.
- Overwhipping the Cool Whip: Fold gently to maintain the airy texture, avoiding lumps in your pudding.
- Not chilling long enough: Skipping the chilling step can lead to a runny dessert; it helps set the layers and flavors.
- Too many decorations: While fun, ensure decorations don’t overwhelm the dessert to keep it easy to enjoy.
- Skipping the crushing step: Crushing the Oreos too coarsely can disrupt the layering and texture.
Zombie Dirt Pudding Cups: Background & Cultural Inspiration
Zombie Dirt Pudding Cups are popular around Halloween when the focus shifts to spooky and innovative treats. Historically, chocolate and vanilla pudding desserts have been adored in American households, often bringing comfort and nostalgia. The fun layering concept reflects creative dessert presentations that have become a staple for kids’ parties. Over the years, variations have emerged, often incorporating seasonal themes, and this particular spin plays on the cultural fascination with Halloween.
Frequently Asked Questions
Can I use different flavors of pudding?
Absolutely! Vanilla or butterscotch pudding works well, and you can experiment with seasonal flavors like pumpkin.
How long can I store these cups?
Store in the refrigerator for up to 3 days. However, for the best experience, enjoy them within the first 48 hours.
Can I make these in advance?
Indeed! You can prepare these cups a day ahead of time, allowing the flavors to meld beautifully.
What is a good substitute for Cool Whip?
You can use any brand of whipped topping or even homemade whipped cream if you prefer a more natural option.
How can I make this recipe gluten-free?
Use gluten-free Oreos to ensure that the pudding cups remain suitable for those with dietary restrictions.
Final Thoughts
Zombie Dirt Pudding Cups are a fantastic way to indulge in the Halloween spirit without spending hours in the kitchen. Their playful presentation and delicious flavors make them an ideal choice for gatherings or a fun treat at home. Try out this recipe for an easy dessert that promises to be a crowd-pleaser and a delightful addition to your Halloween festivities.