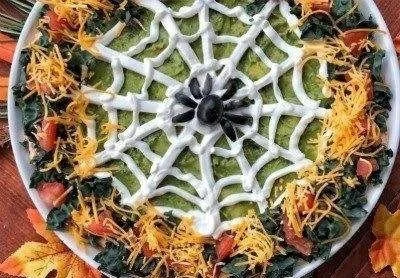
The Easy Halloween Oreo Dirt Cake is a fun, delightful dessert perfect for spooky celebrations. With its layers of creamy chocolate pudding and crushed Oreos, this no-bake treat captures the essence of Halloween while being incredibly simple to make. Best of all, it’s a crowd-pleaser that will bring a smile to all ages.
Why You’ll Love Easy Halloween Oreo Dirt Cake
- No-Bake Convenience: This recipe requires no baking, making it a quick option for last-minute gatherings.
- Family-Friendly Fun: Kids love the idea of “dirt” cake, which makes it perfect for Halloween parties or school treats.
- Customizable Layers: You can adapt the layers and toppings to suit different themes or tastes, offering endless creative possibilities.
- Minimal Ingredients: It’s made with common pantry staples, making it budget-friendly and accessible for all home cooks.
- Chilling Time Adds Flavor: Refrigerating the cake allows the flavors to meld beautifully, resulting in a rich, creamy dessert.
Recipe Overview
- Prep Time: 20 minutes
- Cook Time: 0 minutes
- Total Time: 1 hour 20 minutes (includes chilling)
- Servings: 8-10 servings
- Difficulty Level: Easy
Ingredients You’ll Need for Easy Halloween Oreo Dirt Cake
- 1 package Oreo cookies
- 1 cup butter, softened
- 1 cup powdered sugar
- 1 teaspoon vanilla extract
- 2 cups whipped cream or Cool Whip
- 1 package chocolate pudding mix (about 3.4 oz)
- 2 cups milk
- Gummy worms (for decoration)

How to Make Easy Halloween Oreo Dirt Cake
-
Crush the Oreos: Place the Oreo cookies in a zip-top bag and crush them into fine crumbs using a rolling pin. Set aside for layering later.
-
Mix Butter and Sugar: In a mixing bowl, beat the softened butter, powdered sugar, and vanilla extract together until the mixture is smooth and creamy.
-
Prepare the Pudding: In another bowl, whisk together the chocolate pudding mix and milk for about 2 minutes, until it thickens nicely.
-
Combine With Whipped Cream: Gently fold the whipped cream into the pudding mixture until well combined, ensuring it remains light and fluffy.
-
Layer the Ingredients: In a serving dish or individual cups, create layers starting with crushed Oreos, followed by the pudding mixture. Repeat the layers until all ingredients are used up.
-
Finish with Toppings: Sprinkle remaining Oreo crumbs on top and decorate with gummy worms for a fun Halloween touch.
-
Chill Before Serving: Refrigerate the dessert for at least 1 hour to allow it to set properly before enjoying.
Tips for Success
- Butter Softening: Make sure your butter is softened to room temperature for easy mixing.
- Whipping Cream: When using whipped cream, fold gently to maintain its airy texture.
- Consistency Check: If your pudding is too thick, add a little more milk to reach your desired consistency.
- Layering: Feel free to make more layers for a visually appealing dessert, just adjust the proportions accordingly.
- Chill Well: Allowing it to chill properly enhances the flavors and helps it hold together when serving.
Easy Variations
- Chocolate Variations: Substitute the chocolate pudding with vanilla or butterscotch pudding for a different flavor profile.
- Alternative Cookies: Try using Golden Oreos for a vanilla twist, or mix in other crushed cookies like Nutter Butter.
- Add Some Crunch: Fold in some chopped nuts or candy bars for added texture.
- Gummy Worms Alternatives: Decorate with edible “grass” made from shredded coconut dyed green, or other Halloween-themed candies.
- Lighten It Up: Use low-fat or sugar-free pudding and whipped cream for a lighter dessert option.
What to Serve with Easy Halloween Oreo Dirt Cake
- Fruit Cups: Fresh fruit cups work well to balance the richness of the cake.
- Spooky Cupcakes: Pair it with themed cupcakes for a fun dessert spread.
- Spooky Charcuterie Board: Include a selection of cheeses and spookily themed snacks for guests to enjoy alongside the cake.
- Hot Chocolate: A warm cup of hot chocolate is a comforting drink that complements the dessert nicely, especially in cooler months.
Storage and Reheating
- Refrigerator Storage: Keep any leftovers covered in the fridge for up to 3 days. The cake will become even more flavorful as it sits.
- Freezer Storage: This dessert can also be frozen for up to one month. Just make sure to wrap it tightly to prevent freezer burn.
- Best Reheating Method: If frozen, let it thaw in the refrigerator overnight before serving. There’s no need to reheat.
- Texture Preservation: The texture is best enjoyed chilled and will remain creamy after thawing.
Common Mistakes to Avoid
- Overmixing: Avoid overmixing the pudding and whipped cream to retain the lightness.
- Not Chilling: Skipping the chilling step can result in a runny cake.
- Uneven Layers: Ensure you divide the layers evenly for a balanced dessert.
- Rushing the Crusting: Allow the crushed Oreos to cool completely if you’re incorporating them into any layers.
Easy Halloween Oreo Dirt Cake: Background & Cultural Inspiration
Oreo Dirt Cake has its roots in the classic American trend of “dirt” desserts that are especially popular during Halloween. They playfully mimic the appearance of dirt, hence the name, and use simple, accessible ingredients to create a fun and interactive dessert for kids. The combination of soft textures and crunchy elements makes for an enjoyable culinary experience that brings families together. Its adaptability allows it to fit various occasions beyond Halloween, embodying the spirit of creativity in the kitchen.
Frequently Asked Questions
Can I prepare the Oreo Dirt Cake a day in advance?
Yes, making it a day ahead allows the flavors to meld beautifully, and it will save you time.
Can I use non-dairy whipped cream in this recipe?
Absolutely! Non-dairy whipped cream works well and keeps the dessert suitable for those with lactose intolerance.
What can I substitute for the pudding mix?
You can use instant custard powder or vanilla pudding for a different flavor, but note that it will change the taste of the cake.
How long can I store leftovers?
Leftovers can be stored in the refrigerator for up to three days and can be frozen for longer storage.
How do I prevent the Oreos from getting soggy?
Start layering as soon as you mix the pudding with the whipped cream to minimize any sogginess.
Final Thoughts
The Easy Halloween Oreo Dirt Cake is not only a treat for the taste buds but also a visual delight that captures the spirit of fun during the Halloween season. It’s simple enough for beginners to make yet indulgent enough to impress your guests. If you’re looking for an easy, crowd-pleasing dessert that embodies the creativity of Halloween, this dirt cake is definitely worth trying!
PrintEasy Halloween Oreo Dirt Cake

A fun, delightful dessert perfect for spooky celebrations with layers of creamy chocolate pudding and crushed Oreos.
- Prep Time: 20 minutes
- Cook Time: 0 minutes
- Total Time: 80 minutes
- Yield: 8-10 servings
- Category: Dessert
- Method: No-Bake
- Cuisine: American
- Diet: Vegetarian
Ingredients
- 1 package Oreo cookies
- 1 cup butter, softened
- 1 cup powdered sugar
- 1 teaspoon vanilla extract
- 2 cups whipped cream or Cool Whip
- 1 package chocolate pudding mix (about 3.4 oz)
- 2 cups milk
- Gummy worms (for decoration)
Instructions
- Crush the Oreos: Place the Oreo cookies in a zip-top bag and crush them into fine crumbs using a rolling pin. Set aside for layering later.
- Mix Butter and Sugar: In a mixing bowl, beat the softened butter, powdered sugar, and vanilla extract together until the mixture is smooth and creamy.
- Prepare the Pudding: In another bowl, whisk together the chocolate pudding mix and milk for about 2 minutes, until it thickens nicely.
- Combine With Whipped Cream: Gently fold the whipped cream into the pudding mixture until well combined, ensuring it remains light and fluffy.
- Layer the Ingredients: In a serving dish or individual cups, create layers starting with crushed Oreos, followed by the pudding mixture. Repeat the layers until all ingredients are used up.
- Finish with Toppings: Sprinkle remaining Oreo crumbs on top and decorate with gummy worms for a fun Halloween touch.
- Chill Before Serving: Refrigerate the dessert for at least 1 hour to allow it to set properly before enjoying.
Notes
Allowing the cake to chill enhances flavors and helps it hold together when serving.