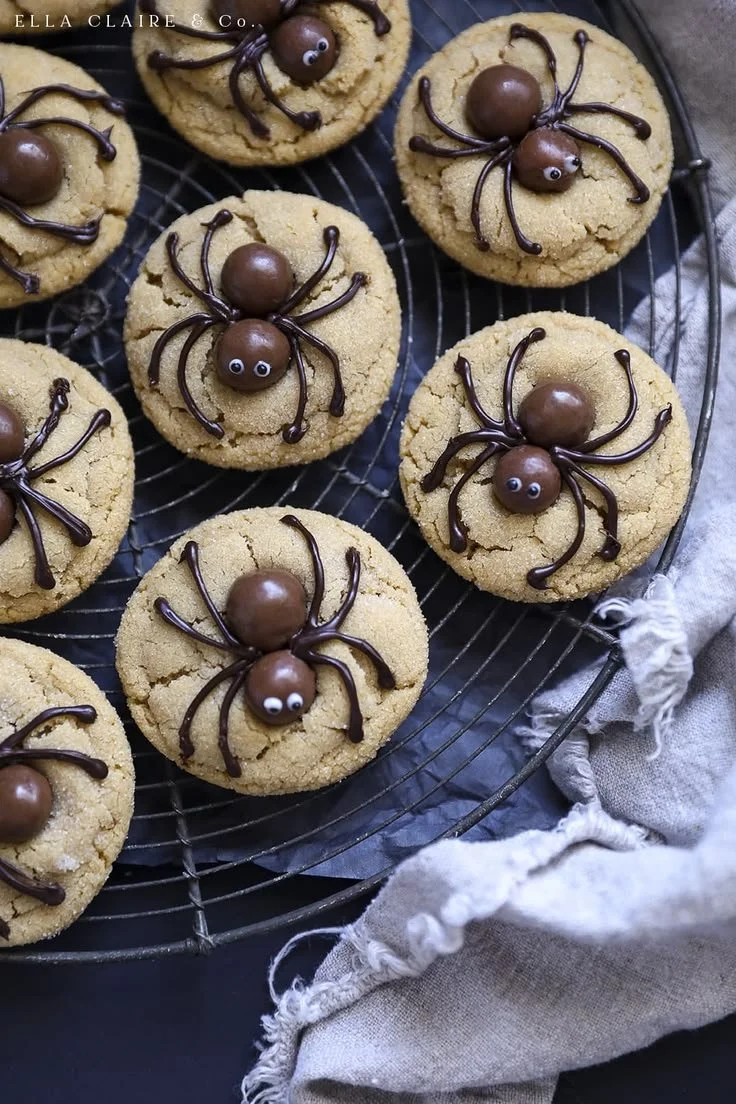
Peanut Butter Spider Cookies are a fun and creative treat that’s perfect for celebrations or just a cozy afternoon bake. They’re easy to make, require minimal ingredients, and bring a delightful twist to your regular cookie routine. These charming cookies will not only win over the kids but impress adults too with their playful presentation and delicious flavor.
Why You’ll Love Peanut Butter Spider Cookies
- Easy to Make: With just a few simple ingredients, these cookies come together quickly, making them perfect for beginner bakers and kids alike.
- Fun and Creative: The spider design adds a fun, festive flair that’s fantastic for Halloween or themed parties.
- No Chill Time Required: You can whip these cookies up and have them ready in about 30 minutes—ideal for spontaneous baking.
- Rich Peanut Butter Flavor: The combination of peanut butter and sugar creates a sweet, nutty cookie that’s irresistibly good.
- Customizable Decorations: You can personalize each spider with different colors and types of chocolate for a unique touch.
Recipe Overview
- Prep Time: 10 minutes
- Cook Time: 10-12 minutes
- Total Time: 20-22 minutes
- Servings: About 18 cookies
- Difficulty Level: Easy
Ingredients You’ll Need for Peanut Butter Spider Cookies
-
Main Ingredients:
- 1 cup peanut butter
- 1 cup sugar
- 1 egg
- 1/2 teaspoon baking soda
-
For Decoration:
- Chocolate candies (for eyes)
- Pretzel sticks (for legs)
Each ingredient serves a specific purpose: peanut butter gives these cookies their rich flavor and chewy texture, while sugar contributes sweetness. If you’re looking for alternatives, you can use crunchy peanut butter for extra texture or substitute the sugar with a sugar alternative to make it a bit healthier.
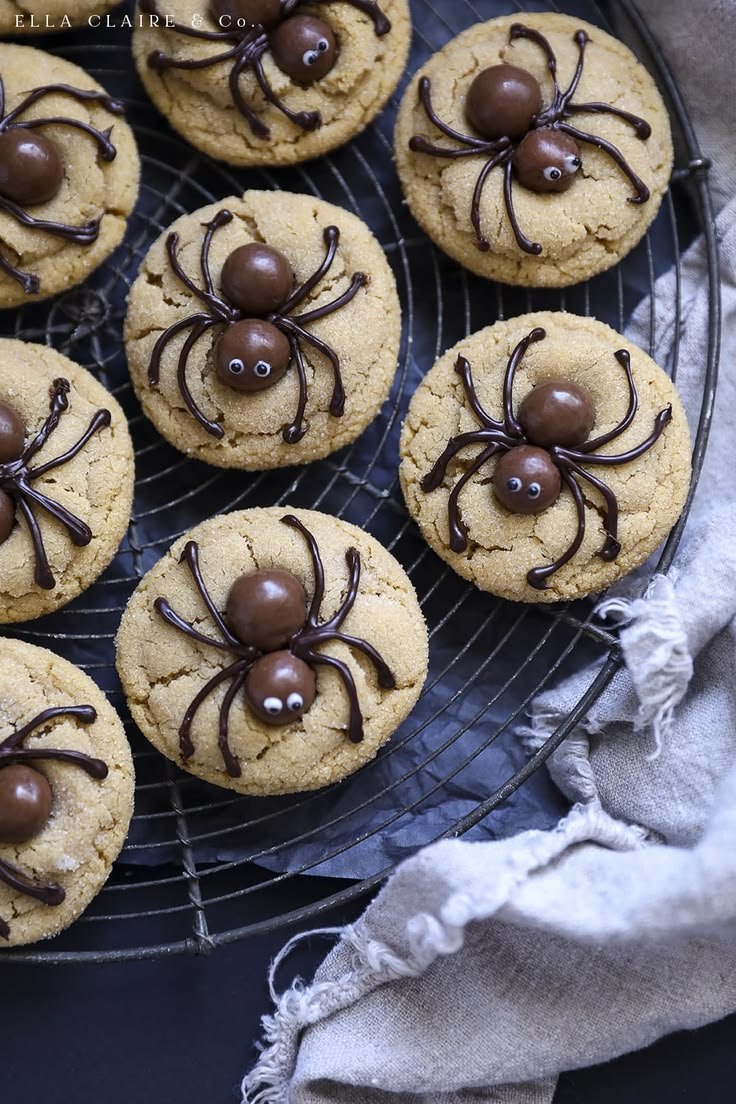
here
How to Make Peanut Butter Spider Cookies
-
Preheat the Oven
Preheat your oven to 350°F (175°C). This ensures your cookies bake consistently. -
Mix the Dough
In a mixing bowl, combine 1 cup of peanut butter, 1 cup of sugar, 1 egg, and 1/2 teaspoon of baking soda. Mix until well combined and smooth. -
Form the Cookies
Using a tablespoon, scoop portions of dough and roll them into balls. This step is crucial for the right size. -
Prepare for Baking
Place the balls of dough on a baking sheet lined with parchment paper, ensuring they’re spaced apart to allow for spreading. -
Flatten the Cookies
Gently press each ball to flatten it slightly. This helps them bake evenly and gives them a nice shape. -
Bake the Cookies
Place the baking sheet in the preheated oven and bake for 10-12 minutes, or until the cookies are lightly golden around the edges. -
Add the Decorations
Allow the cookies to cool slightly on the baking sheet. Then, while still warm, add chocolate candies for the eyes and stick pretzels into the sides as legs. -
Cool Completely
Let the cookies cool completely before serving to ensure they hold their shape.
Tips for Success
- Use Room Temperature Ingredients: Make sure your peanut butter is at room temperature to blend well with the other ingredients.
- Don’t Overbake: Remove the cookies from the oven while they are still soft; they will continue to firm up as they cool.
- Experiment with Toppings: Use different types of candy for the eyes or change the pretzel size for varied spider looks.
- Cool on a Wire Rack: For the best texture, transfer the cookies to a wire rack after a few minutes on the baking sheet.
Easy Variations
- Chocolate Chips: Mix in semi-sweet chocolate chips for an extra chocolatey flavor.
- Different Nuts: Swap out peanut butter for almond or cashew butter for a unique taste.
- Seasonal Spices: Add a pinch of cinnamon or pumpkin spice for a seasonal twist.
- Vegan Option: Replace the egg with a flax egg (1 tablespoon flaxseed meal mixed with 2.5 tablespoons water) for a vegan version.
- Mini Spider Cookies: Make smaller balls of dough to create mini versions of these cookies.
What to Serve with Peanut Butter Spider Cookies
- Milk: A classic pairing, milk complements the rich peanut butter flavor.
- Chocolate Milk: For a fun and indulgent twist, serve these cookies alongside chocolate milk.
- Ice Cream: Try them with vanilla or chocolate ice cream for an enviable dessert combo.
- Fruit Slices: Fresh fruit like apple or banana slices add a refreshing balance to the sweetness.
Storage and Reheating
- Refrigerator Storage: Store leftover cookies in an airtight container in the refrigerator for about a week.
- Freezer Storage: For longer shelf life, freeze cookies in a single layer, then transfer them to a freezer-safe bag. They can last up to three months.
- Reheating: Reheat in the microwave for a few seconds to soften or enjoy them at room temperature.
- Texture Preservation: To maintain their chewy texture, let them cool completely before storing.
Common Mistakes to Avoid
- Overmixing the Dough: Mix just until the ingredients are combined; overmixing can lead to tougher cookies.
- Baking on a Hot Pan: Ensure your baking sheet is cool before adding the cookie dough to prevent spreading.
- Not Measuring Ingredients Accurately: Use proper measuring cups for dry and wet ingredients to ensure consistency in your cookies.
Peanut Butter Spider Cookies: Background & Cultural Inspiration
Peanut butter cookies are a staple in American baking, cherished for their simplistic charm and delightful taste. The addition of a whimsical spider design has made these cookies particularly popular around Halloween, when creativity in food often takes center stage. The fun shapes inspire storytelling and imagination, creating moments for families to bond while baking together. The cookie design has roots in science and nature, encouraging children to learn about spiders in a fun and sweet way.
Frequently Asked Questions
Can I use natural peanut butter for this recipe?
Yes, natural peanut butter works well but may yield a slightly different texture. Ensure it is well mixed to avoid separation.
How long can I store peanut butter spider cookies?
They can be stored in an airtight container in the fridge for up to one week, or frozen for up to three months.
Can I make these cookies without baking soda?
Baking soda is important for creating the right texture. If you don’t have it, consider using baking powder, but the cookies may be a bit denser.
Can I prepare the dough ahead of time?
Yes, you can prepare the dough ahead and refrigerate it for up to 24 hours before baking.
What should I do if the dough is too sticky?
If the dough feels too sticky, add a little more sugar or peanut butter to help with rolling.
Final Thoughts
Peanut Butter Spider Cookies are a delightful treat that brings joy and creativity into the kitchen. With their simple preparation and fun presentation, they’re a wonderful way to celebrate any occasion or just satisfy a sweet tooth. So gather your ingredients and make some memories while baking these charming cookies—they’re definitely worth the effort!
PrintPeanut Butter Spider Cookies
Fun and creative Peanut Butter Spider Cookies that are perfect for celebrations or a cozy afternoon bake.
- Prep Time: 10 minutes
- Cook Time: 12 minutes
- Total Time: 22 minutes
- Yield: 18 cookies
- Category: Dessert
- Method: Baking
- Cuisine: American
- Diet: Vegetarian
Ingredients
- 1 cup peanut butter
- 1 cup sugar
- 1 egg
- 1/2 teaspoon baking soda
- Chocolate candies (for eyes)
- Pretzel sticks (for legs)
Instructions
- Preheat your oven to 350°F (175°C).
- Combine peanut butter, sugar, egg, and baking soda in a mixing bowl.
- Scoop portions of dough and roll them into balls.
- Place the balls on a baking sheet lined with parchment paper.
- Press each ball to flatten it slightly.
- Bake for 10-12 minutes, or until lightly golden.
- Add chocolate candies and pretzels for decoration while cookies are warm.
- Cool completely before serving.
Notes
Use room temperature ingredients for best results. Don’t overbake the cookies.