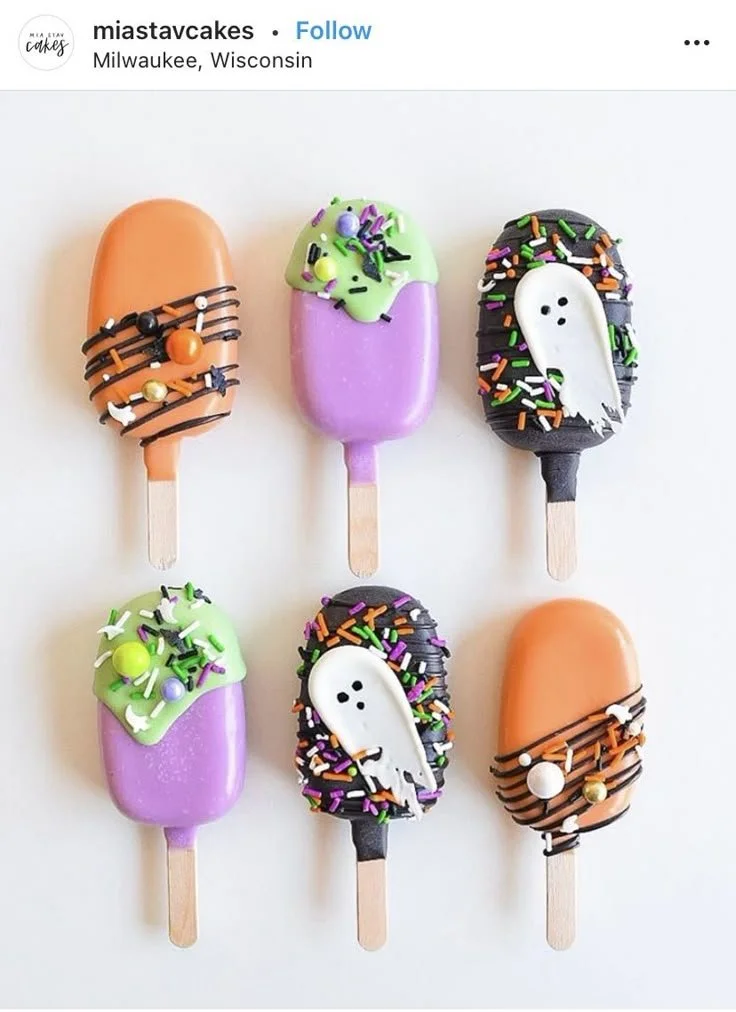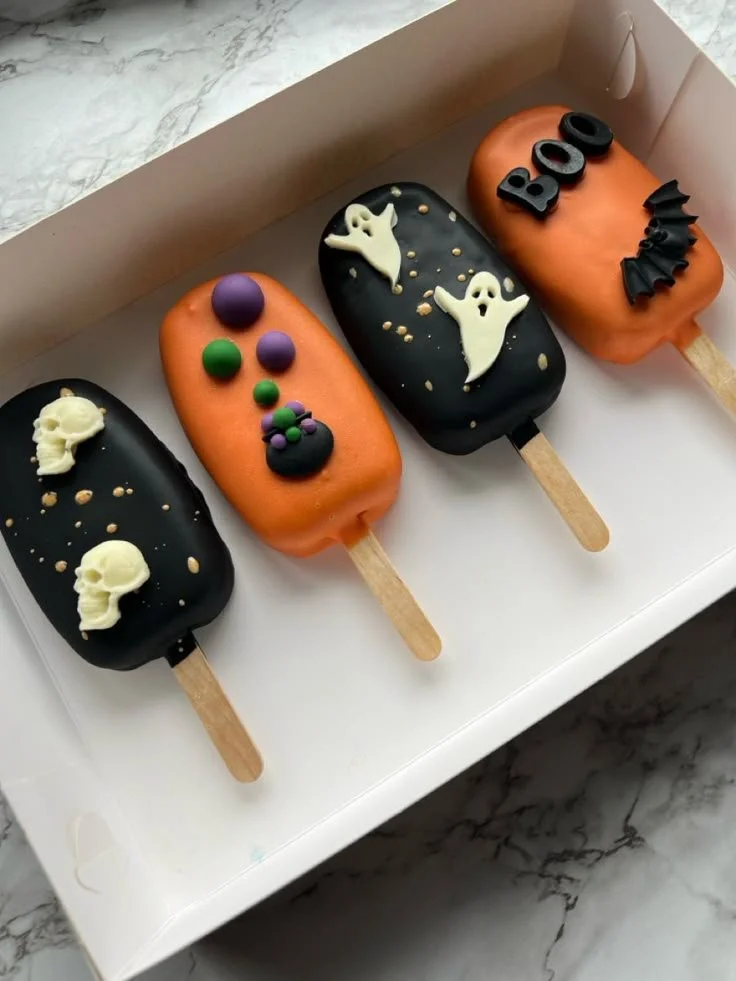
A delightful blend of flavors and a hint of sweetness make these Halloween cakesicles the perfect treat for celebrating the spooky season. Not only are they fun to make, but they also allow for creativity in flavor and decoration. Whether for a party or a festive family gathering, these cakesicles are sure to charm everyone who sees (and tastes) them!
Why You’ll Love Halloween Cakesicles
- Fun and Festive: These Halloween cakesicles are a perfect way to get into the spirit of the season. They are not just tasty; their playful presentation makes them a hit with kids and adults alike.
- Customizable: You can easily personalize these cakesicles with different flavors, colors, and decorations to match your party theme or personal taste.
- Simple to Prepare: With straightforward steps, this recipe is accessible for cooks of all skill levels, making it a fun activity for family and friends to enjoy together.
- Make-Ahead Convenience: You can prepare cakesicles in advance, making them an excellent option for busy holidays when you want to save time while still impressing your guests.
- Perfect for Any Occasion: While they are ideal for Halloween, these cakesicles work for birthdays, seasonal parties, and more, ensuring you can whip them up year-round.
Recipe Overview
- Prep Time: 30 minutes
- Cook Time: 20 minutes
- Total Time: 50 minutes (plus chilling time)
- Servings: 12 cakesicles
- Difficulty Level: Easy
Ingredients You’ll Need for Halloween Cakesicles
-
Cakes:
- 1 box of vanilla or chocolate cake mix (plus eggs, oil, and water as directed on the package)
-
Decorative Coating:
- 2 cups white chocolate or candy melts (for coating)
- Food coloring (optional, for coloring the coating)
-
Fillings:
- 1 cup frosting (store-bought or homemade, any flavor)
-
Toppings:
- Halloween-themed sprinkles
- Edible glitter (optional)
- Candy corn or other Halloween candies for decoration

How to Make Halloween Cakesicles
-
Bake the Cake:
Bake the cake according to the package instructions. Let it cool completely before handling. -
Crush the Cake:
Once the cake is cooled, crumble it into fine pieces in a large mixing bowl. Aim for a fine, crumbly texture for even mixing. -
Mix with Frosting:
Add the frosting to the crumbled cake. Mix well until the mixture is moist and holds together easily. You can adjust the amount of frosting to achieve the desired consistency. -
Shape the Cakesicles:
Using your hands, take a portion of the cake mixture and roll it into a cylinder shape, about the size of a popsicle. Place each shaped mixture onto a lined baking sheet. -
Insert Sticks:
Insert a popsicle stick into each cakesicle, making sure it’s pushed in firmly. Freeze the cakesicles for at least 30 minutes or until they are solid. -
Melt the Coating:
While the cakesicles are freezing, melt the white chocolate or candy melts as per package instructions. If desired, add food coloring to create festive hues. -
Coat the Cakesicles:
Remove the cakesicles from the freezer. Dip each one into the melted coating, allowing excess to drip off. Ensure they are fully coated. -
Add Decorations:
While the coating is still wet, sprinkle with Halloween-themed sprinkles and any other desired toppings. -
Chill Again:
Return the decorated cakesicles to the baking sheet and refrigerate until the coating is set, about 15-20 minutes.
Tips for Success
- Cooling the Cake: Make sure the cake is completely cooled before crumbling to avoid a soggy mixture.
- Don’t Overmix: When combining the cake and frosting, mix just until mixed to keep a good texture.
- Use Quality Coatings: For the best coating, use high-quality chocolate or candy melts. They melt better and create a smoother finish.
- Experiment with Flavors: Customize the cake flavor and frosting combination to suit your taste preferences.
- Keep Chilling: If the cakesicle mixture gets too warm while shaping, return it to the refrigerator to firm up before continuing.
Easy Variations
- Chocolate Cakesicles: Use a chocolate cake mix and chocolate frosting for a double chocolate treat.
- Red Velvet Version: Use a red velvet cake mix with cream cheese frosting for a festive twist.
- Pumpkin Spice: Substitute the cake mix with pumpkin spice cake mix and cream cheese frosting for a seasonal favorite.
- Nutty addition: Add finely chopped nuts or toffee bits into the mixture for added texture and flavor.
- Dipped in Chocolate: Instead of candy melts, dip cakesicles in dark or milk chocolate for a classic taste.
What to Serve with Halloween Cakesicles
- Halloween Punch: A fun, themed drink can complement the sweets, enhancing the festive atmosphere.
- Decorative Cheese Board: Pair these treats with a cheese board featuring seasonal fruits and cheeses for a delightful contrast.
- Mini Ghost Cupcakes: Cake and frosting together create an appealing display when served alongside these cakesicles.
- Fruit Salad: A refreshing fruit salad provides a balance to the sweetness of the cakesicles.
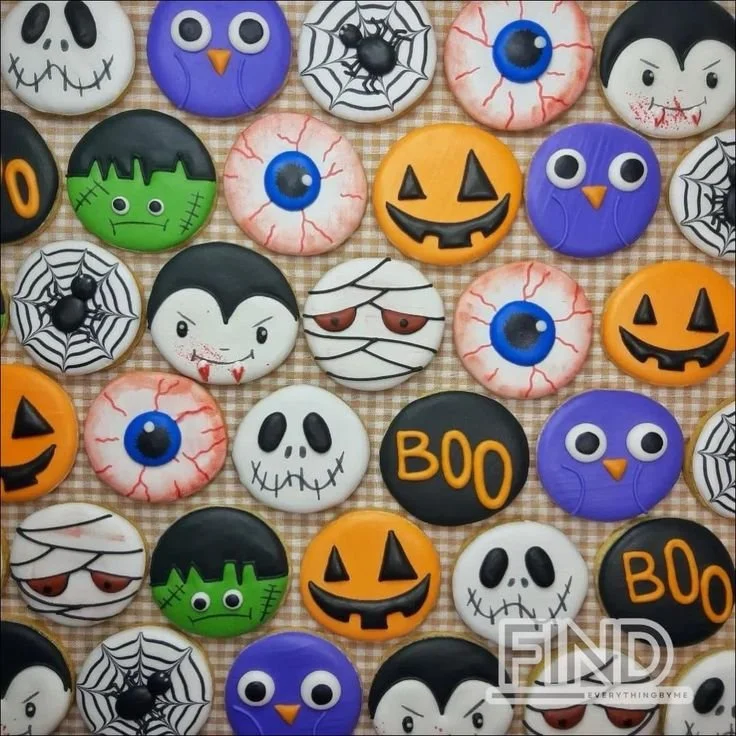
- Themed Cookies: Serve with Halloween cookies for a variety of textures and flavors that match the holiday spirit.
Storage and Reheating
- Refrigerator Storage: Store leftover cakesicles in an airtight container in the refrigerator for up to one week.
- Freezer Storage: For longer storage, wrap each cakesicle tightly in plastic wrap and place them in a freezer-safe container for up to a month.
- Best Reheating Method: These cakesicles are best enjoyed chilled or at room temperature, so no need for reheating.
- Preserving Texture: Allow frozen cakesicles to thaw in the refrigerator for a few hours before serving for the best texture.
Common Mistakes to Avoid
- Using Warm Cake: Do not use warm cake for mixing, as it can lead to a soupy texture.
- Skipping the Freeze Step: Freezing cakesicles before coating ensures they hold their shape better during dipping.
- Overheating the Coating: Microwave the chocolate in short intervals, stirring frequently to avoid burning.
- Skipping Decorations: Dressing up the cakesicles enhances their appearance and appeal; don’t skip this step!
- Using Too Much Frosting: Balance is key; too much frosting can make the cakesicle overly sweet and difficult to shape.
Halloween Cakesicles: Background & Cultural Inspiration
Halloween hasn’t always been about spooky decorations and trick-or-treating. Its roots can be traced back to the ancient Celtic festival of Samhain, a time when people believed the boundary between the living and the dead was blurred. Over the years, it evolved into a festive occasion filled with treats and fun activities. Cakesicles, while a modern twist, pay homage to the spirit of creativity and celebration that accompanies this holiday. They provide a fun, interactive way for families and friends to unite in celebration, blending tradition with contemporary flavors.
Frequently Asked Questions
Can I use any cake flavor for cakesicles?
Yes, you can use any cake flavor that you prefer, including vanilla, chocolate, or even red velvet. Choose your favorite!
How long can I store cakesicles?
They can be stored in the refrigerator for up to one week, or frozen for up to a month.
Is there a way to make these cakesicles dairy-free?
Absolutely! Use dairy-free cake mix and frosting. For the coating, look for dairy-free chocolate alternatives.
Can I prepare cakesicles ahead of time?
Yes, you can make them ahead of time and store them in the refrigerator or freezer for later enjoyment.
What’s the best way to thaw frozen cakesicles?
For the best texture, thaw them in the refrigerator for a few hours before serving.
Final Thoughts
Halloween cakesicles are a delightful way to celebrate the spooky season, combining fun and flavor in an easy-to-make treat. Their versatility allows for endless creativity, making them perfect for any gathering. Whether you’re making them for a party, a family treat, or just to enjoy at home, these cakesicles will surely bring joy to your Halloween festivities. Give this recipe a try, and enjoy the smiles they bring!